Install Your Own Solar Panels – A Step-by-Step Guide
In recent years, the shift towards renewable energy has become more than a trend. It’s a necessity. Among the various options available, solar energy is a remarkably accessible and sustainable choice. Little wonder it’s ubiquitous. With this in mind, you can install your own solar panels, taking control of their energy needs and reducing their environmental footprint. Installing solar panels offers a sense of personal achievement and brings significant cost savings in the long run. Our complete guide will walk you through the DIY solar panel installation process and offer a comprehensive view of what it takes to set up your own solar system at home.
Assessing Your Needs and Capabilities
Determining Energy Requirements for Your Home
Before you install your solar panels, the first step is understanding your energy needs. This involves evaluating your current electricity consumption, usually on your utility bills. Knowing how much power you typically use can estimate the size and number of solar panels needed to supply your home adequately.
Evaluating the Suitability of Your Home for Solar Panels
Not every home is ideally suited for a solar system. Several factors come into play:
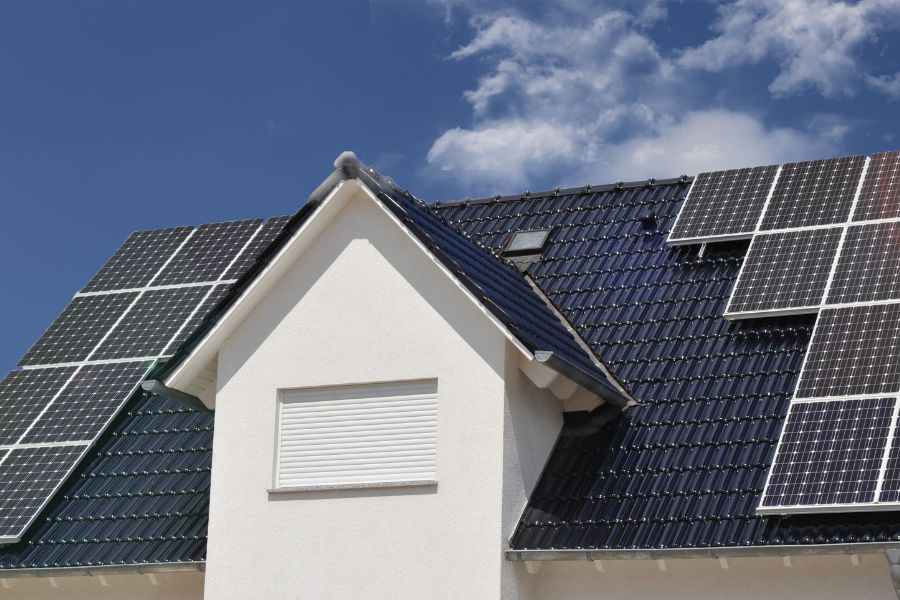
- Roof Condition and Orientation: Your roof should be in good condition, with enough space to accommodate the panels. South-facing roofs typically capture the most sunlight, but other orientations can still be viable.
- Shading and Environmental Factors: It’s essential to consider elements like tree shade, which can significantly impact the efficiency of your panels.
- Structural Strength: Your roof must be able to support the weight of the panels.
Understanding Local Regulations and Permits Required
Each region has its own set of rules and regulations regarding solar panel installation. You’ll need to research and comply with local building codes, zoning laws, and homeowners’ association rules. Additionally, obtaining the necessary permits is crucial to ensure your DIY solar panel installation is legal and up to standard.
In this phase of planning to install your own solar panels, thoroughly assess your home’s suitability and your personal capability. This preparation sets the foundation for a successful DIY solar panel installation. Plus, it ensures that your investment in your own solar system is well-informed and viable.
Choosing the Right Solar Panels and Equipment
Types of Solar Panels and Their Efficiency
The heart of your solar energy system lies in your chosen solar panels. There are mainly three types of solar panels available:
- Monocrystalline: Known for high efficiency and sleek design, but usually the most expensive.
- Polycrystalline: More affordable with slightly lower efficiency.
- Thin-Film: Flexible and budget-friendly, but with the lowest efficiency.
Your decision should be based on a balance between your budget, the space available for installation, and the efficiency you desire from your solar power system.
Additional Equipment Needed
Apart from solar panels, a complete DIY solar panel system requires additional components:
- Inverters: To convert the DC electricity generated by the panels into AC electricity used in homes.
- Mounting Systems: To securely fix the panels on your roof or ground.
- Solar Batteries (optional): For energy storage, applicable if you want to store excess energy for use when the sun isn’t shining.
- Charge Controller: To regulate the voltage and current from the panels to the battery, preventing overcharging.
Tips for Selecting Quality Materials Within Budget
- Quality is critical in a solar installation, so always opt for top-notch products.
- Look for certified panels and components with good warranties.
- Research brands and read reviews to understand their performance and durability.
- While staying within your budget, prioritize the best long-term value components.
Planning and Preparation
Creating a Detailed Installation Plan
Planning is crucial for a successful DIY solar installation. So, you can do the following while creating a plan:
- Sketch a layout of how the panels will be placed.
- Calculate the total number of panels needed based on your energy requirements and roof space.
- Ensure your plan adheres to local regulations and safety standards.
Tools and Safety Equipment Required
A list of necessary tools should include:
- Safety harnesses and gloves.
- Drilling and roofing tools.
- Wiring tools for electrical connections.
- Multimeter for testing.
Safety should never be compromised. So, have the proper safety gear and ensure you are comfortable working at heights.
Pre-Installation Checklist
- Site Assessment: Confirm that the installation site is ready and safe.
- Roof Preparation: Ensure the roof is in good condition and bears the weight of the solar panel system. You may need to replace your roof if it’s in bad condition.
- Material Acquisition: Purchase or order all the required materials and tools in advance.
The cornerstones of setting up your own solar energy system are selecting the right components for your DIY solar panels and thorough planning. This phase helps your renewable energy project remain efficient, safe, and compliant with all necessary standards.
When carefully choosing your solar panels and equipment and meticulously planning your installation, you set a strong foundation for a successful DIY solar project.
Installation Process
Step-by-Step Guide to Installing Solar Panels
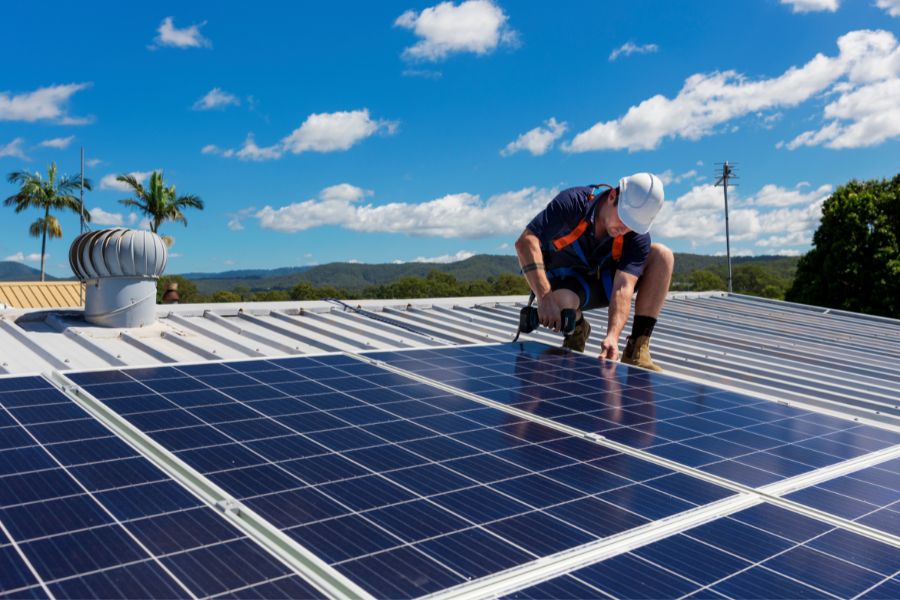
Mounting the Panels
- Begin by setting up the mounting structure, ensuring it is angled correctly for maximum sunlight exposure.
- Secure the solar panels onto the mounting structure. Take care to follow the manufacturer’s instructions for your specific panels.
Wiring and Electrical Connections
- Connect the solar panels to the inverter. This step usually involves stringing the panels together in series or parallel, depending on your solar array’s design.
- Keep all electrical connections secure and properly insulated to prevent electrical hazards.
Setting Up Inverters and Batteries (if applicable)
- Install the inverter in a location that’s easily accessible and well-ventilated.
- If you’ve chosen to use batteries in your system, connect them to the inverter as per the DIY solar panel kit instructions.
Testing and Troubleshooting
- Once everything is connected, test your system to ensure it’s functioning correctly.
- Check for any issues like loose connections or non-functioning panels and rectify them.
Safety Precautions During Installation
- Always follow safety guidelines, especially when working on the roof or with electrical components.
- If you’re not confident about any step of the DIY installation, don’t hesitate to consult a professional.
Connecting to the Grid
Understanding Grid-Tied vs. Off-Grid Systems
- In a grid-tied system, your solar panels are connected to the public electricity grid. This allows you to feed excess electricity to the grid and draw power when your panels aren’t producing enough.
- An off-grid system, on the other hand, is entirely independent and usually requires batteries to store power.
Process of Connecting to the Grid, If Applicable
- If you opt for a grid-tied system, you must work with your local utility company to set up the connection.
- This process typically involves some paperwork, an inspection of your solar panel installation, and the installation of a bi-directional meter.
Net Metering and How It Works
- Net metering is a system that credits solar energy system owners for the electricity they add to the grid.
- If your solar array produces more energy than you need, the excess goes to the grid, and you receive a credit on your electricity bill.
Maintenance and Care
Routine Maintenance Tips for Solar Panels
- Regular Cleaning: Keep the solar panels clean from dust, dirt, and debris. You can use a hose or a soft sponge to clean it often. Avoid using abrasive materials that could scratch the panels.
- Inspections for Damage: Regularly inspect your panels for any damage, such as cracks or discoloration, and address issues promptly to maintain efficiency.
- Monitoring System Performance: Use a monitoring system to track the performance of your solar panels. A significant drop in energy production could indicate a problem that needs attention.
- Ensuring Clear Surroundings: Trim any overhanging branches that may shade the panels or drop leaves and debris on them.
- Professional Maintenance Checks: Consider having a professional check your system annually, especially for more complex components like inverters or electrical connections.
Troubleshooting Common Issues
Common issues like inverter malfunctions or reduced energy output often have straightforward solutions, such as resetting the inverter or cleaning the panels. Keep a manual handy for basic troubleshooting steps.
Financial Considerations and Incentives
Cost Breakdown of DIY vs. Professional Installation
- DIY Installation: Typically, a DIY solar panel installation can save you on labor costs. However, it requires a significant time investment and some technical know-how.
- Professional Installation: While more costly upfront, it offers the advantage of expertise, often comes with warranties, and ensures all electrical work is up to code.
Information on Tax Credits, Rebates, and Incentives
- Governments and local authorities often offer incentives like tax credits and rebates to encourage the adoption of solar energy. These significantly offset the initial investment.
- Research local and federal programs available in your area. Some utilities also offer incentives for solar energy generation.
Calculating Return on Investment
- Consider factors like the initial cost of the solar panel system, expected lifespan, maintenance costs, energy savings, and any incentives.
- Calculate how long it will take for the energy savings to cover the initial investment. This period is known as the payback period.
In a Nutshell
Each step in setting up your own solar power system requires diligence and commitment. So, pay attention to every step, from the initial assessment of your home’s energy needs to carefully selecting equipment and the meticulous installation process.
While the DIY route demands a certain level of technical skill and time investment, it provides a unique opportunity to understand and engage with renewable energy technology deeply. Ultimately, homeowners can boost the global shift towards sustainable living. How? By embracing solar energy. You can start positively impacting the environment and future generations.
Leave a Reply