Build a Solar Water Still That Actually Works (Step-by-Step DIY Guide)
Transform contaminated water into clean drinking water using a solar water still – an elegant example of off-grid solar solutions that harnesses natural evaporation and condensation processes. This time-tested purification method requires only basic materials: a glass panel, a collection container, and a black-bottomed basin. By capturing the sun’s energy, a properly constructed solar still can produce up to 4 liters of pure water daily, making it an invaluable tool for emergency preparedness and sustainable living.
Building your own solar water still not only provides a reliable source of clean water but also reduces reliance on conventional energy sources. Whether you’re preparing for emergencies, living off-grid, or simply interested in sustainable technology, this DIY project offers an environmentally conscious solution to water purification challenges. The following guide will walk you through constructing a professional-grade solar still using readily available materials and proven design principles.
Understanding Solar Water Still Technology
The Science Behind Solar Distillation
Solar water distillation harnesses the same natural process that creates rain in our atmosphere. At its core, solar thermal technology drives a simple but effective purification cycle. When sunlight passes through the glass or transparent cover of the still, it heats the water inside, causing it to evaporate. This evaporation process naturally separates pure water molecules from contaminants, minerals, and other impurities.
As water vapour rises, it encounters the cooler glass surface, where it condenses back into liquid form. This condensation process creates pure water droplets that flow down the angled surface and collect in the designated channel. The temperature difference between the warm water basin and the cooler glass cover is crucial for efficient operation, typically maintaining a gradient of 10-15°C for optimal performance.
This process effectively removes up to 99% of impurities, including salt, bacteria, and other contaminants, making it an excellent sustainable solution for water purification. The beauty of this system lies in its passive operation, requiring no external energy input beyond natural sunlight.

Key Components and Materials
To construct your solar water still, you’ll need the following essential materials, most of which are readily available at European hardware stores and garden centres:
Primary Components:
– Large glass or transparent plastic sheet (minimum 1m²)
– Black-painted metal or plastic container (20-30L capacity)
– Food-grade silicone sealant
– Clean sand or gravel (approximately 5kg)
– Collection trough (plastic or stainless steel)
– Food-grade plastic tubing (1m length)
Structural Materials:
– Wooden boards or recycled pallets for frame
– Stainless steel screws and washers
– Weather-resistant hinges (2-4 pieces)
– Rubber gaskets or weather stripping
– UV-resistant paint or sealant
Tools Required:
– Electric drill with bits
– Screwdriver set
– Measuring tape
– Spirit level
– Utility knife
– Safety equipment (gloves, goggles)
– Sandpaper (various grits)
Optional Enhancements:
– Solar-powered fan for increased efficiency
– Temperature sensor
– Additional insulation material
– Activated carbon filter
Remember to source materials from certified suppliers to ensure food-grade quality where necessary and optimal performance of your solar still.
Construction Process
Building the Basin
The basin serves as the foundation of your solar water still, collecting both the contaminated water and the purified condensation. Begin by selecting a sturdy, dark-coloured container approximately 1 metre square and 15 centimetres deep. While specialized solar-grade materials are available, a food-grade plastic container or stainless steel basin works effectively for home projects.
Thoroughly clean your chosen container and ensure it’s completely level when placed on the ground. Create a slight slope (approximately 2-3 degrees) towards one corner by placing small wooden blocks or adjustable feet under the opposite side. This gradient helps direct condensed water towards your collection point.
Install a small outlet pipe at the lowest corner of the basin. Use food-grade silicone sealant around the pipe connection to prevent leaks. The pipe should extend outside the still’s frame for easy collection of purified water.
Paint the interior of the basin with non-toxic black paint to maximize heat absorption, unless you’re using an already dark-coloured container. For optimal efficiency, consider adding a layer of insulation beneath the basin to minimize heat loss to the ground.
Place a collection vessel beneath the outlet pipe, ensuring it’s properly positioned to catch the purified water. The basin’s setup significantly influences your still’s efficiency, so take time to verify all connections are watertight before proceeding to the next construction phase.
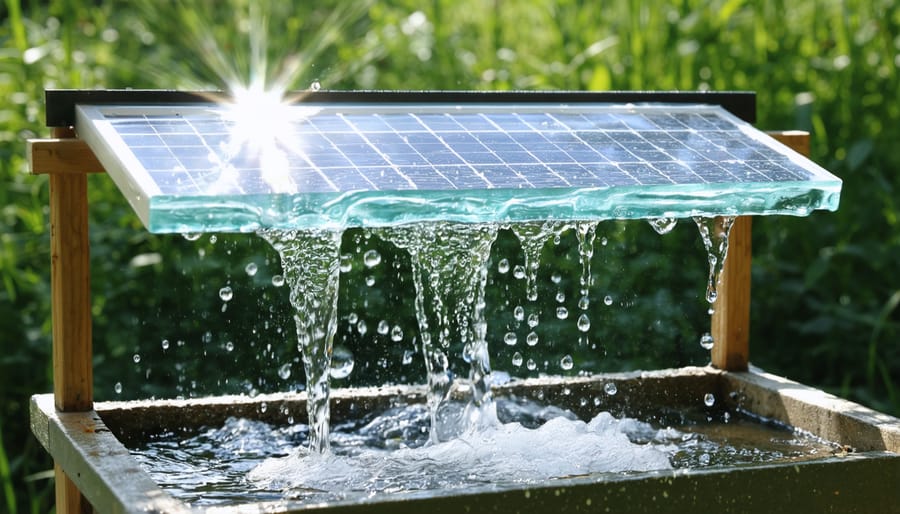
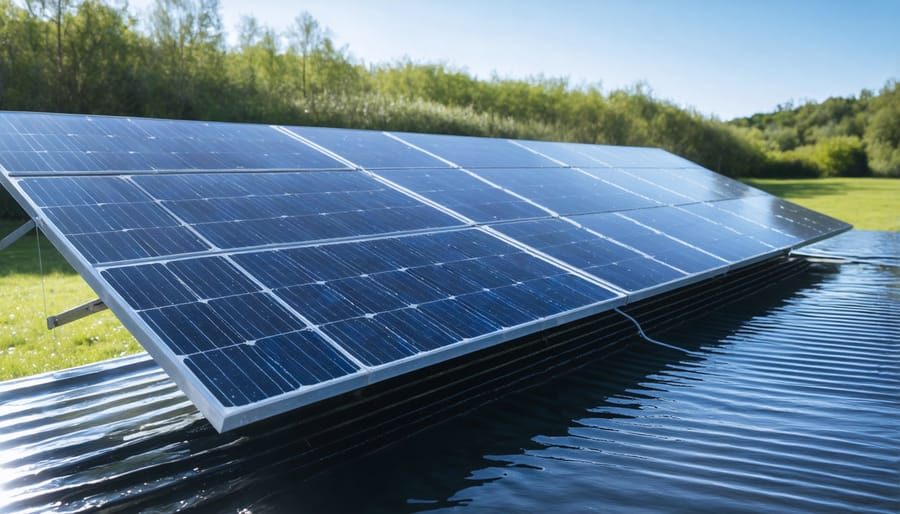
Installing the Glass Cover
The glass cover serves as the crucial condensation surface for your solar water still, requiring precise installation for optimal efficiency. Select a single piece of tempered glass that extends slightly beyond your basin’s edges, ideally 4-6mm thick for durability and heat retention. Before placement, thoroughly clean both sides of the glass using a lint-free cloth and distilled water to ensure maximum transparency.
Position the glass at a 20-25 degree angle, with the lower edge extending into the collection trough. This precise angle optimises water droplet formation and collection while maximising solar exposure. Secure the glass using weather-resistant silicone sealant along all edges where it meets the frame, creating an airtight seal that prevents vapour loss.
Apply the sealant in a continuous bead, working systematically from one corner to ensure no gaps remain. For added stability, install rubber gaskets or weatherstripping tape between the glass and frame at key pressure points. Allow the sealant to cure completely according to manufacturer specifications, typically 24-48 hours, before testing the still.
Verify the installation by checking for any gaps or leaks using a bright light source during evening hours. Address any identified gaps promptly with additional sealant to maintain system efficiency. Remember to handle the glass with care and consider using protective gloves during installation to prevent fingerprints and ensure safety.
Setting Up the Collection System
The collection system is a crucial component of your solar water still, requiring careful setup to ensure maximum efficiency. Start by creating a condensation surface using a clean glass or plastic panel positioned at a 30-degree angle. This optimal angle allows water droplets to flow smoothly into your collection channel without falling back into the basin.
Install a collection channel along the lower edge of your condensation surface using food-grade silicone tubing or a clean plastic gutter. Ensure all materials are suitable for potable water use and comply with European safety standards. The channel should have a slight downward gradient (approximately 2-3%) to direct water flow towards your collection container.
Position a clean, food-grade container at the end of your collection channel. Consider using a dark-coloured container with a tight-fitting lid to prevent algae growth and contamination. Install a small mesh filter at the channel’s outlet to catch any debris that might enter the system.
For enhanced collection efficiency, create a sealed environment between your condensation surface and the water source. Use weather-stripping or food-grade silicone sealant around the edges to prevent vapor loss. Remember to include a small air vent to maintain proper pressure balance within the system.
Monitor the collection point regularly during initial operation to ensure proper flow and make any necessary adjustments to the angle or sealing.
Optional Enhancements
To enhance your solar water still’s performance, consider implementing these innovative upgrades that can significantly boost efficiency and output. Installing a reflective surface around the collection basin, such as polished aluminum sheets or mirrors, can increase solar concentration and heat absorption. This simple modification aligns with modern sustainable energy systems principles and can improve distillation rates by up to 30%.
Consider adding a heat-absorbing material, such as black stones or charcoal, to the base of your still. These materials retain heat longer, extending the distillation process even after direct sunlight diminishes. Installing a double-glazing system using two layers of glass or transparent plastic can reduce heat loss and create better insulation.
For automated operation, integrate a small solar-powered pump to maintain optimal water levels in the basin. This enhancement ensures consistent production without manual monitoring. Adding a basic filtration system before the water enters the still can extend the maintenance intervals and improve overall water quality.
Temperature sensors and automated venting systems can help optimize performance by maintaining ideal conditions within the still. Consider incorporating a small LED display to monitor key parameters such as water temperature and production rate, enabling better system management and efficiency tracking.
Operation and Maintenance
Daily Operation Tips
To maximise water production from your solar water still, maintain consistent monitoring and follow these essential operating practices. Start by checking the still early in the morning to ensure optimal positioning for maximum sunlight exposure throughout the day. Adjust the angle of your collector surface seasonally – approximately 30-45 degrees in winter and 20-30 degrees in summer for most European locations.
Clean the glass cover daily to prevent dust and debris from reducing solar efficiency. Use a soft, lint-free cloth and avoid harsh cleaning agents that might leave residue. Inspect the seal between the glass and frame regularly to prevent vapour loss, which can significantly impact water production.
For optimal yield, refill the source water container when levels drop to about one-third capacity. Maintain a water depth of 5-7 cm for efficient heat absorption. During peak summer months, you may need to refill twice daily depending on production rates.
Monitor the collection container and empty it before it reaches full capacity to prevent backflow. The best collection times are typically late afternoon to early evening when the system has had maximum sun exposure. In European climate conditions, expect production to vary seasonally, with peak efficiency during summer months.
Keep detailed records of daily water production to identify patterns and optimise performance based on local weather conditions. This data will help you fine-tune the system’s operation for your specific location and needs.
Maintenance Schedule
To ensure optimal performance of your solar water still, establish a regular maintenance routine. Clean the glass cover weekly, removing any dust, debris, or mineral deposits that may reduce solar transmission. Use a soft cloth and mild soap solution, avoiding abrasive cleaners that could scratch the surface.
Inspect the seals and connections monthly to prevent water vapour leakage. Replace any deteriorated silicone sealant or gaskets immediately to maintain efficiency. Check the collection trough for accumulated sediment or mineral deposits, cleaning it thoroughly with vinegar solution when necessary.
During winter months, drain the system completely if temperatures drop below freezing to prevent damage from ice formation. Conduct a thorough inspection of all components seasonally, paying special attention to structural integrity and potential corrosion points.
Common issues you may encounter include:
– Reduced water output: Usually caused by dirty glass or compromised seals
– Discoloured collection water: Often due to mineral buildup or contaminated input water
– Condensation problems: typically related to temperature differentials or poor sealing
For optimal results, replace the input water filter every 3-6 months depending on water quality and usage. Document all maintenance activities and water production rates to track system performance over time. This helps identify potential issues before they become significant problems.
If you notice any substantial decrease in water production or system efficiency, perform a complete system check focusing on seal integrity, glass cleanliness, and proper water flow patterns.
Performance Expectations and Applications
A well-constructed solar water still can typically produce between 2-4 litres of clean water per square meter of collection area on a sunny day. However, output varies significantly based on several factors, including local climate, seasonal sunlight availability, and design efficiency. In optimal conditions during summer months, European users can expect peak performance between 10:00 and 16:00 hours.
These systems prove particularly valuable for various applications, from garden irrigation to emergency preparedness. They excel in remote solar applications, where traditional water sources may be unreliable or unavailable. Small-scale installations can effectively support individual household needs, while larger setups can serve community gardens or small agricultural projects.
For residential use, a 2-square-meter still can provide sufficient drinking water for 2-3 people during sunny conditions. However, it’s essential to maintain realistic expectations – these systems work best as supplementary water sources rather than primary supply solutions in most European climates.
The technology demonstrates exceptional sustainability credentials, operating without electricity or chemical additives. While initial water production may seem modest compared to mechanical purification systems, the zero-energy operation and minimal maintenance requirements make solar water stills an innovative choice for long-term water security planning.
Building a DIY solar water still represents a significant step towards sustainable water management and energy independence. By harnessing solar power to purify water, you’re not only reducing your environmental impact but also developing resilience against water scarcity. The simple yet effective design principles we’ve explored demonstrate how accessible clean water technology can be for European households. Remember to regularly maintain your solar still, monitor its performance, and adjust the setup according to seasonal changes in sunlight intensity. As water resources become increasingly precious across Europe, implementing such innovative solutions becomes crucial. Your solar water still project contributes to a broader movement towards sustainable living while providing a reliable source of clean water for your household needs.
Leave a Reply